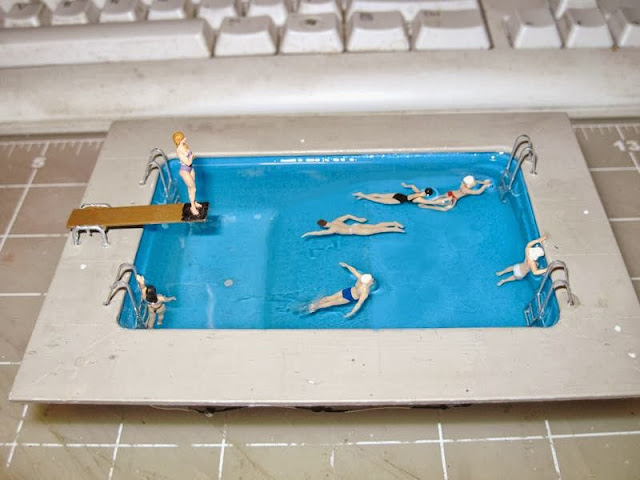
Back in December of 2009 I built up a small removable section for my layout using a Walthers Cornerstone Two Story House Kit and a scratch built swimming pool. Over a period of several years the Woodland Scenics Real Water in the pool evaporated and dried up into what looked like old floor wax buildup. It was time to do a total remodel.
After a week of research on Model Railroad Forums I found out that I wasn't alone, there were many posts about Realistic Water . . . . all bad.
In searching the Forums, Magic Water from Unreal Details was the favorite by far so I went for it and this post is about my New Pool Project.

Magic Water is available in three sizes, Jumbo Size 96 oz., Magic Water 18 oz. and Miniaturists 6 oz. I chose the 6 oz. because my swimming pool is small.
I prepared the pool for Magic Water by measuring the amount of liquid needed to make my first pour of ⅜" per the instructions. The instructions say to limit each pour to ½" so to be on the safe side I'm doing ⅜" per pour. I lucked out because the amount needed to keep the pour to ⅜" is 15 mil so that made the 2 to 1 mix easy, 5 mil of 'A' Hardener and 10 mil of 'B' Resin. The instructions say Mix, Mix, Mix, and Mix Again so that is my plan.

I glued three ladies in the pool before the first pour using superglue. I have one more lady and two men actually posed in swim mode that I will float in the Magic Water when the pours have reached nearer to the top of the pool water level.

The pool is made from a plastic hardware box from Home Depot. They have several different sizes of boxes that wood screws come in so I had a good assortment of boxes to chose from. I used the box lid to make the bottom slope of the pool. The pool ladders are Athearn Caboose ladders painted with Folk Art Acrylic Silver.

For increased realism I installed six "under water" pool lights, the bulbs are 3mm 12 volt 70 ma. I removed a round spot of paint 1/16" (scaled 6") in diameter for the lights to illuminate the figures in the water.
I will add pictures of the pool as I continue with the Magic Water, it will take four to five pours with 24 hrs between pours per the instructions.
October 12th 11:30am First Pour

The first pour went well, I MIXED, MIXED and MIXED per instructions.

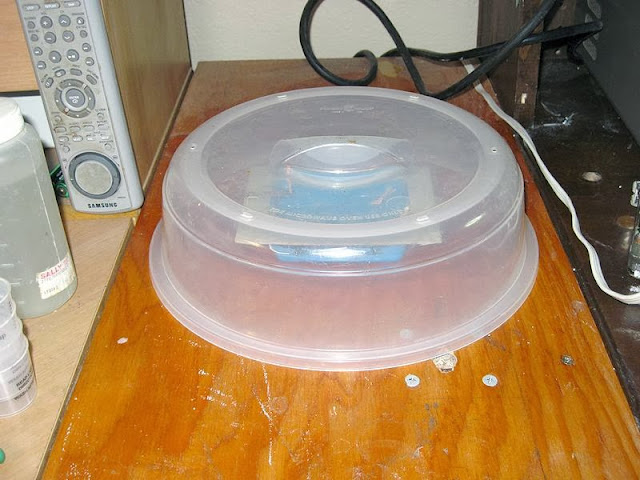
As we live in the lower San Joaquin Valley and have a constant breeze from the north we get all of the Bay Area SMOG here 24/7, as the SMOG dries it falls to the ground as a dirty brown gunk. It leaves a layer of fine gunk on everything so to protect my Magic Water in my swimming pool I put a cake cover over it until it cures. I will do this with each new layer of Magic Water.
Bakersfield is normally number one for worst SMOG in the US, thanks San Francisco.
October 13th 10:00 am Second Pour

So far so good, the Magic Water is working as advertised. I Mixed, Mixed and Mixed again as per instructions and it's looking very good. The next pour will cover the legs of the young lady in the red bikini and the feet of the other two.
October 14th 9:00 am Third pour

This is the third pour, so far so good. Everything is going very well. This pour was a bit over ⅜" leaving a little over an ⅛" for the last pour.

The last pour will have the three figures above in the water swimming. The Magic Water final level will be just above the shoulders of girl in the red bikini. The last pour will be tomorrow morning and I'm having a hard time waiting for this one to cure.
After trying to come up with a plan to suspend the three figures in the last pour I decided to do two pours. I will do a thin pour and place my swimmers in the Magic Water and let it cure over night then do a final pour that will sandwich the figures just under the surface. With the figures at surface level any capillary action of the Magic Water above the surface should appear as water motion of them swimming.
October 14th 9:00 pm Fourth Pour

This is pour number four with the three figures swimming imbedded in the Magic Water. I went with this pour at 16 hrs after pour three. With pour three not fully cured I was able to push two of the figures into the slightly soft pour to keep them at the correct angle for the last pour.
October 15th 8:00 am Final Pour

The last pour went very good, tomorrow I'll clean it up and do some finishing touch-ups and install the pool on my removable section. The Magic Water works fantastic and I've ended up with a great looking swimming pool. If all goes as planed it should look really good with the lighting on and the pool party in full swing.
It's only been 12 hrs since the final pour so the Magic Water isn't fully cured but I took pictures anyway.

The following pictures show my swimming pool with the proper water level and all the figures in place.

I will place the pool on the module in the morning and fill the gaps around the pool with flocking.

The Magic Water will be fully cured by 8:00 am.

My swimming pool is finally finished. The Magic Water is crystal clear and the pool looks fantastic. I'll start a new post shortly showing the pool in place on the module along with the pool party in action.
October 16th 9:00 am Waiting
Because of the SMOG gunk from the Bay Area I have decided to let the Magic Water cure an additional 24 hrs.

The Magic Water it terrific, it is crystal clear even though my close up pictures show it grainy.

I took a few close up shots to show the slight capillary action of the Magic Water as well as to showoff the detail of the Preiser figures. All the figures in the pool are factory painted as is from the package. The springboard is scratch built from K&S brass stock. The pool deck is 1/16" sheet styrene from Evergreen. The ladders are Athearn Caboose ladders painted with Folk Art Silver Acrylic craft paint. I normally use craft Acrylic pint for all my model railroad projects, they a much lower in cost and there are hundreds of colors to pick from. Another very good advantage of Acrylic paint is water cleanup. This will finish this post, I'll start a new post starting with placing the pool on the module.

