
In starting out with this post I must state for the record that I am a Rivarossi Articulated Aficionado! I know the majority of model railroaders out there would disagree with me but the Rivarossi articulated locomotives can make a very nice addition to any locomotive roster with a little tweaking. Their shell castings are well detailed and most of the details are very close to scale. The Rivarossi mechanism is also nicely designed with one exception, the motor. I have a total of 18 great running Rivarossi articulated locomotives that would rank very high with the best out there anywhere. All but one have been remotored, I was purposely retaining it in original condition but I will use it for this remotoring project post.
I have kitbashed three Cab Forward 4-8-8-2s to AC-9 Yellowstones 2-8-8-4, three Rivarossi Y6Bs into two early Cab Forward AC-3s 2-8-8-2 and one MC-1 class 2-8-8-2. All are very good runners.
This is a link to my Locomotive Inventory.
I only purchased one of my Rivarossi articulateds new; the rest were bought or acquired used, and many were basket cases. The Cab Forward that I bought new came with NMRA RP-25 wheel flanges, the rest all have deep flanges. Some of my large fleet came from our local model railroad show held yearly here in Bakersfield at the Kern County Fairgrounds and a few came from model railroading friends, the majority were picked up off eBay.
I have adopted two standards to remotor Rivarossi articulated locomotives, single motor and dual motor. The two motors that I use in my standard remotor configuration are the Faulhaber 2224SR and the Canon EN22. A single Faulhaber 2224SR is a very powerful Neodymium magnet motor and will power the largest HO locomotives easily, it can be a bit pricy. The Canon EN22 also uses Neodymium magnets but is a smaller frame can motor compared to the Faulhaber. The older (pre 1990s) Rivarossi Cab Forwards will accept two Canon EN22 motors with a bit of elbow grease. A single EN22 will power an Rivarossi Articulated locomotive better than the original Rivarossi motor but dual motors give it a much smoother operation with the power to pull your socks off if you add some weight to the boiler, I'll cover adding weight later in this post.
The best source for motors and motor information that I have found is Motorman, his site is Micro Loco Motion He also has a store on eBay.
At this point I should probably add some information on Neodymium magnet motors. Neodymium is a Rare-Earth magnet with almost eight times the magnetic field strength of an Alnico magnet. The Faulhaber 2224 develops more than four times the torque of the Rivarossi Alnico magnet motor at ¼ the current draw. The low RPM power of a Neodymium magnet motor is almost eight times more powerful than a conventional Alnico magnet motor. A lot more power with a lot less current, need I say more?
The picture below is a mid 1970s Rivarossi Cab Forward. It was a gift from my railroad buddy Dan in Ohio.


Shell removed

Reference information.

This is a Canon EN22 motor
A single Canon EN22 will power the Cab Forward very nicely. The unloaded Canon EN22 motor is 5400 RPM at 12 volts. Under full load it drops to about 4800 RPM, the Rivarossi gearbox drive is 17:1 so the 0.640" drivers turn a little over 280 RPM. The 0.640" wheel equals 2.13628" per revolution or at 280 RPM the wheel has traveled 598"/49.8' in one minute which calculates out to roughly 50 MPH top speed.
The Canon Technical Specifications are available at the Canon site.


It is necessary to grind a notch in the end of the frame with a Dremel tool using ⅜' diameter metal cutting bit. I cut the notch to a curve to match the diameter of the Canon motor. It wasn't necessary to cut the motor shaft or the gearbox shaft to install the first motor. A NWSL Universal with 2 mm holes fit perfectly.
You can see the Sharpie marks in the center of the weight/frame where the second motor will go. I use Crafters Amazing Goop (available at any Craft Store) to glue the motors in place, Goop works great as a motor mount. It is a bit messy to work with but worth every sticky minute. Goop absorbs motor/mechanical vibrations better than any other glue I've tried and super strong after it is fully dry. If you need to remove the motor it can be easily accomplished using a sharp #11 blade and long nose pliers to pull out the rubbery stuff. It will be necessary to paint the motor black because of the windows in the cab.
It is important to test run both motors individually with the universals connected to the gearbox and motor to make sure everything turns easily with no binding or vibration. Even micro adjustments of the motor will effect the alignment at the universal joint.
It will be necessary to clamp both motors in place while the Goop is curing. Install the NWSL universal joints before gluing the motors in place. Continue checking the alignment of the shafts and universals until the Goop sets up, that takes about an hour.
For those that want a smooth running powerful Cab Forward the two motor concept is for you. There are multiple reasons for going with dual motors.
#1) for most railroaders this adds super pulling power if you add weight to the locomotive.
#2) the Rivarossi runs much smoother and creeps super slow.
#3 it reduces drive line vibration and noise.
My CAD drawing below shows the modifications needed for a single or dual remotor.

The combination of the flat side of the motor towards the window with the tilt leaves enough room to add an engineer sitting in the window area to help hide the motor.
The next picture shows the frame/weight notched so that the Canon EN22 motor shaft will mate up to the gearbox.

Notice the thickness of the frame/weight after cutting the notch for the motor, you have to be very careful not to break it. I cut 8 weights to accept the second motor and didn't break any of them. It's a touchy project but it can be done. Believe me it's well worth the effort for the superb performance of a dual motor Rivarossi Cab Forward.


Since I started the dual motor kitbash I decided it was easier and better overall to make a new frame. I constructed a very nice frame from K&S Brass Strips. Check out my latest Post.
https://melvineperry.blogspot.com/2014/08/august-9-2014-remotoring-rivarossi-cab.html
Now onto More Power by adding weight to the inside of the shell/boiler. It is possible to add as much as 10 ounces of weight to the shell/boiler. I did one at 10 ounces a second at 8 ounces and the rest have 6½ ounces added which seem to work well. The heavy locomotive has a Faulhaber motor and it runs the most realistic, because of all the weight it really drags slow until it gets up to running speed then it's got all the power needed to pull a full freight load up my 3½% grades. Drawbar pull at slip is just short of 6 ounces.

I use a Dymo 0 to 5 pound postal meter to weigh my model railroad equipment. I purchased a 25 pound bag of #8 bird shot from a local gun shop for around $30. In half pound increments it goes a long way.
This method can be used to add weight to any rolling stock too. It is very easy to do, simply fill the area you want to become solid weight and pour AC glue over the BBs. Work slowly as the AC in bulk will heat up during the curing process. When it has dried (less than a minute) it is like solid lead, be careful that you don't make any mistakes because in seconds it's very permanent.
I use a lot of Harbor Freight (HF) items constantly and one is their super glue. It works as good if not better than the super glue you find at the Big Box Stores at 20% of the cost. It took .4 ounces of super glue to seal the bird shot in the shell above. I use the HF ten pack of .1 once tubes for general use because they're easier to use, when they dry up you've only wasted a very small amount of glue.
The actual Super Glue that I use to "seal in" the bird shot is HF Super Glue. When it cures it is as if the 1/16" BBs are solid lead!
At this time I must note that adding weight to the point the wheels won't slip is very dangerous. If you stall or lock the rotor in the motor it can burn up quickly! The wheels will still slip on my super heavy Cab Forward with the Faulhaber motor, a motor with less power can stall easily with added weight. Extra weight can stress the motor and cause it to overheat. The Rivarossi motor in one of the Y6Bs I bought off eBay had been so hot it melted the cab and it didn't have any extra weight.
I'm really into lighting up my projects and my Cab Forwards are not an exception. I have illuminated the marker lamps and number boards on every one of my Rivarossi Locomotives. I used Cal-Scale #190-280 brass castings for the marker lamps by drilling them out and installing 1½ volt 1 mm diameter bulbs. All but two of my Cab Forward number boards are illuminated with warm white LEDs. I have a mix of headlights on the engines and backup lights on the tenders. I use 1½ volt 3 mm bulbs for headlights as well as 3 mm warm white LEDs. I power the 1½ volt bulbs from a voltage regulator circuit that I assembled and dropping resistors for the LED from rail power.
I bought this clunker off eBay. It one was probably in the worst condition of any of my purchases. The monkey deck was broken off but that is somewhat normal for a used Rivarossi. After all isn't that's what eBay's purpose is for, for model railroaders to unload and buy clunkers? The pictures below are of what it looked like out of the box.

The exterior isn't too bad, better than I expected from the pictures posted on eBay.

The deeper I got into disassembly the worse it got. It had a built-up of rust, dirt, grease and grime on everything inside. The motor wouldn't turn at all. The gear boxes had 40 year old Rivarossi grease that had hardened like old floor wax, I had to dig it out with a screwdriver.

A piece of the right corner was broken off the pilot but the coupler lifter mechanism kept it from being lost.

There is a missing air compressor and power box on the smoke box and both marker lamps as well as the whistle are gone. That too is normal for a Rivarossi Cab Forward purchased off eBay.

Two hours of elbow grease and it was up and running as good as when it was new. Now it's time for the "Body Work".
Cosmetic
repair would normally be tough because of the lack of parts since
Rivarossi went under, but I have that under control. I made molds
of every detail part on the Cab Forwards and Y6Bs as well as their tenders, I have an excellent
inventory of detail replacement parts. I Purchased a Casting Kit from Micro-Mark
and make the parts from resin.

Marker Lights:
I use Cal-Scale Lost Wax Castings for most of my added details. This is the Cal-Scale 190-280 marker light that is my SP steam standard.

They are much closer to scale than the Tomar 807s. The Cal-Scale Markers are non illuminated lost wax brass castings, I drilled them out and installed 1mm 1½ volt micro-bulbs.
I drilled out the lenses with a #60 drill and then enlarged the hole in the rear with a #56 drill so that the micro bulb will slide in.


The picture above shows four Cab Forwards with the Cal-Scale markers installed ready for painting.
Number Boards:
I built up the number boards from .01" white styrene.

I used the same process above for my Cab Forwards, the difference being the number board is flat instead of triangular.

The Cab Forward above has new markers installed as well as the number boards.

The picture above shows the "Light Pipe" I made from a piece of scrap clear Acrylic with a Grain of Wheat lamp glued in the center to illuminate the number boards. I only used Grain of Wheat lamps on the first two Cab Forwards, the rest have bright white LEDs for the back light. It is much easier to work with LEDs versus incandescent light bulbs when using light pipes. Filing a plastic LED flat then attaching it to the acrylic "light pipe" with super glue is much easier than using GOWs.

The above picture is an actual decal sheet that I printed out, the Dime is for size reference. The text in the number board decals are Century School Book, Bold, #5 font, black on clear decal paper.
The Cab Forward above has one piece decals on the number boards, that's much easier than individual numbers.

All of my boiler shells have the marker lights installed but #4126, upper row far right.
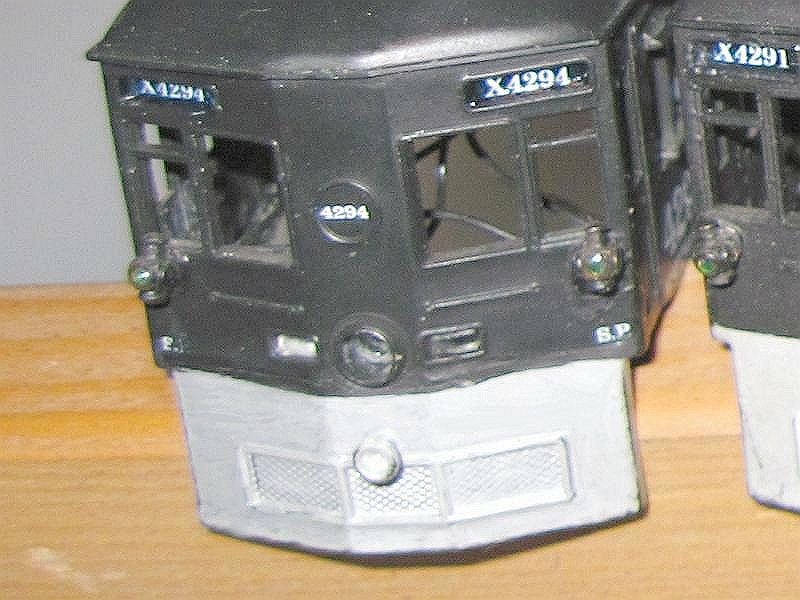
This is one of my Cab Forwards with the locomotive number herald between the windows. The Alps MD1000 makes printing white numeral decals slick as a whistle.
Tenders & Wiring:
Tenders & Wiring:
When a locomotive is remotored they become super easy to convert to DCC operation. All of my locomotives are wired for DCC operation. Only a few have decoders installed, $$$$. The most critical problem using DCC is good conductivity. The Rivarossi tender trucks are the pits for power pickup. Part of my restoration process is making my locomotives run better than they did out of the box brand new. The Rivarossi tender trucks have to go! I use Precision Scale Trucks exclusively, #31553 Cab Forward Pilot, #31554 Cab Forward Trailing Truck and #32346 Buckeye Tender Trucks. I also add 4 ounces of weight to each tender to help conductivity.
I also use 8 pin NMRA type connectors as a standard for my DCC wiring. Every tender has a 8 pin connector ready to accept a decoder. The tenders have a short "pig tail" 8 pin NMRA male connector that plugs in under the monkey deck on the Cab Forwards. I made shorting plugs for every tender so that the locomotive has the ability to operate on a standard non DCC layout.
The picture below is a Rivarossi Oil Tender with my DCC mods. I added an extra weight by gluing the weights to the sides of the shell instead of the floor. The floor space is reserved for a speaker. I mounted the NMRA DCC connector on a 5/8" diameter styrene tube for easy access.

The DCC decoder will attach to the top of the tender shell with double sided tape.
I made the DCC pigtail 4" long so that it would be long enough for easy connection to the locomotive. I cut a 5/8" x 5/16" hole for the wires to pass through the front end of the tender to the locomotive. I started with a smaller hole but the wires would hang up and cause derails. The larger hole makes for an easier install too, the connector will pass through the larger hole. The wiring harness can be made in advance then simply installed in one piece instead of soldering on a plug and having to hassle with the shell too.

I mounted all of my DCC connectors on my locomotives with the red wire terminal on the lower right and put a dob of red paint on the connectors for easy identification.

This tender had both rear steps missing, those steps are castings that I made with my casting kit. The Rivarossi tender trucks are not the best trucks in the world by far so I replaced them with brass Precision Scale 6 wheel Buckeye trucks.
I drew up this wiring diagram originally for my Cab Forward but now I use this circuit on all of my steam locomotives.


The schematic below is the voltage regulator for the marker lights. I use this circuit for the 1.5 Volt lights in my passenger cars along with either a AA or AAA NiMh battery. The batteries prevent flickering while the train is in motion.

I use the regulator with 1½ volt bulbs in all my passenger cars and cabooses for constant brightness. Because of only four wheel trucks the lighting flickers as the trucks pass over turnouts so to prevent the flickering I use an on-board battery charged by the voltage regulator circuit above.
I use latching reed switches glued to the roof in side the cars to turn on and off the lights with a magnet. The reed switches are in series with a micro toggle switch mounted under the car frame. I have two tracks in my display and a siding as well as a storage track in my yard that can be powered 24/7 for charging the on-board batteries.
For any requests about
this post please send them to